[ToDoList] Basic Pages
Well that was fun. However all we’ve really done is spooked someone called Bob, without actually creating anything remotely resembling a web application. Let’s rectify this and create some pages one would normally find on a website; a Home page and an About page.
Because we already learned a bit about MVC, we know that we will need a controller and at least one view to display these pages
(we won’t need to worry about models until we’re handling real data).
As before, we’ll need to add a route configuration so Rails knows where to go, too.
Rails provides a fair bit of magic to streamline this process in the form of generators.
However, because we’re learning, we’re going to do this manually for now and learn what this magic entails, so we can appreciate it more later.
We already created a PagesController in the last section, so let's use that to define actions for our two pages:
app/controllers/pages_controller.rbclass PagesController < ApplicationController ## inherting functionality from master controller def home ## Nothing needed here! end def about end end
The eagle-eyed among you will notice something a bit odd here: the methods we created don’t do anything - we just defined them and left them blank.
Again, this is down to Rails magic; as long as the controller's class and action's method is valid (i.e. defined), Rails will know where to look for what it needs by the conventions it relies on.
In this case, it will look for a view where the filepath after /app/views aligns with the controller and method name.
As we learned earlier, basic Rails views are housed in .html.erb files,
which are seemingly regular HTML pages that have the superpower of allowing Ruby to be embedded directly into them using <% %> notation.
ERB goes to a whole other level of magic and discerns whether you want to do something in the background or display something in the foreground,
simply by whether or not an equals sign is included in the opening tag (<%= %>):
-
would define an array in the background but display nothing on the web page.<% arr = [‘x’, ‘y’, ‘z’] %> -
would insert the first value of that array into the HTML itself, in this case:<%= arr.first %>x.
Similarly to how the ApplicationController acts as a predecessor from which our controllers inherit their base functionality,
all of our views are simply sections of a web page that use the application layout view (/app/views/layouts/application.html.erb)
as a wrapper.
The application layout contains all the universal HTML (such as doctype and html tags, as well as our stylesheets in the
head tag), so that all we need to add into our views is the important bits pertinent to the specific page.
The default application layout view will look something like the following:
Our views are inserted into the template using theapp/views/layouts/application.html.erb<!DOCTYPE html> <html> <head> <title>ToDoList</title> <meta name="viewport" content="width=device-width,initial-scale=1"> <%= csrf_meta_tags %> <%= csp_meta_tag %> <%= stylesheet_link_tag "application", "data-turbolinks-track": "reload" %> <%= javascript_importmap_tags %> </head> <body> <%= yield %> </body> </html>
<%= yield %> tag in the body block in the template HTML.
Other things like the document title that appears on the browser bar is also defined here.
So let’s create the views for the pages we have defined in our PagesController.
Following the convention, create a pages directory to contain our views (remember snake_case for file paths):
$ mkdir app/views/pages#home action:
home.html.erb:
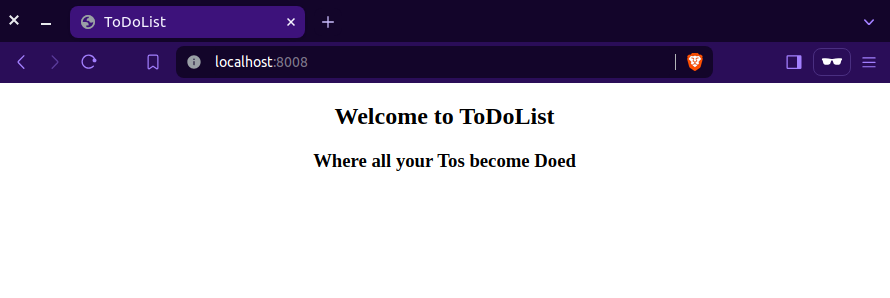
app/views/pages/home.html.erb<div align="center"> <h1> Welcome to ToDoList </h1> <h3> Where all your Tos become Doed </h3> </div>
The above code doesn’t need to be copied exactly - have some fun with it.
Do the same for the #about view (about.html.erb):
app/views/pages/about.html.erb<div align="center"> <h2> About Us </h2> <div> <p> Clever and sophisticated individuals, creating order and harmony via the medium of To-Do entries (which we will mark off of our own to-do list!) </p> </div> </div>
Now that we’ve created and populated our controller & views, we need to tell Rails to use them.
In our routes config, lets add a new route and edit our previous one for root:
Notice that in the line configuring the route for the About page, the value ofconfig/routes.rbroot 'pages#home' get '/about', to: 'pages#about'
get denotes the URI path and
to tells Rails where to look for what it needs to do about it (just like root).
With all this done, refresh your app in your browser and bear witness to the beautiful page that you have created!

But, oh no, we have no way of accessing the About page we created!
I suppose we could just add /about to the end of the URL in the browser's address bar, but we're better than that.
Let’s create some a navigation bar with some links for our web app.
As you probably already know, regular HTML would expect you to use an <a> anchor tag and
specify the URI path that you want to link to with an href argument.
However, we are using Rails which comes equipped with sorcery to streamline this even further with a shockingly simple convention.
If we check our routes again to show the updated output from our changes to the config in the previous section,
we can see that each route has a prefix:
$ bundle exec rails routes
      Prefix   Verb   URI Pattern                             Controller#Action
        root   GET    /                                       pages#home
about GET /about(.:format) pages#aboutpath (e.g. about_path),
Rails will instinctively understand this to mean the path for the route that the prefix corresponds to (i.e. /about).
While very cool, the immediate question is, "How does this help me create a link on my web page?"
The answer to this is yet another piece of Rails magic: a helper. These are built-in Rails methods intended to hide (abstract) logic away from our view code
and make it easier to read and understand (less "brittle"), and there are many that Rails contains by default.
In fact, we've already used a helper above to reference our routes - about_path is an example of a dynamic path helper.
The helper that we want in this case is the link_to helper - by passing the path helper
to the link_to helper (even including an inner text value if desired), we can create a hyperlink infinitely more readable than in vanilla HTML:
<%= link_to 'About', about_path %>
Remember the application layout view we looked at earlier?
Let’s use our new knowledge of the link_to and path helpers, in conjunction with ERB’s ability to insert values into HTML,
to create a navigation bar into the template so that we can see it on every page.
Go ahead and insert the following above the <%= yield %> tag
in the application layout view's <body> block:
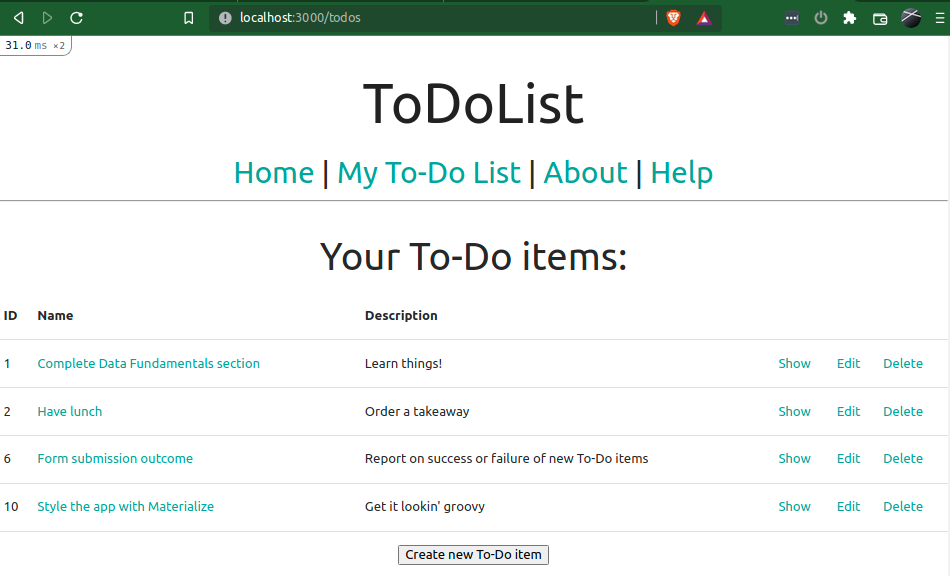
(Note that adding our own HTML to this file in this way isn't exactly elegant, but it will suffice while we are building our app - we can tidy it up later during the refactoring stage).app/views/layouts/application.html.erb<div align="center"> <h1> ToDoList </h1> <h4> <%= link_to 'Home', root_path %> | <%= link_to 'About', about_path %> </h4> <hr /> </div>
We now have a navigation bar showing global heading as well as clearly named links to each of the pages we have set up so far,
automatically applied to each page because we added it to the application layout.
Go ahead and reload your browser, and relish in spending an inordinate amount of time clicking the links between the Home and About pages
(it might have just been me that did this).

Well that was intense.
Let’s use everything we’ve learned to create a Help page that isn’t in the least bit actually helpful.
Feel free to have a go at this yourself, and consult the table below for reference:
| Element | File | Code |
|---|---|---|
| Action |
app/controllers/pages_controller.rb
|
|
| View |
app/views/pages/help.html.erb
|
|
| Route |
config/routes.rb
|
|
| Link |
app/views/layouts/application.html.erb
|
|
Check if you've done this right by navigating to your home page (starting the server if you stopped it before), and getting to the Help page from it.

You have made some fantastic progress if you’ve gotten this far,
so order yourself a pizza and change your job on Facebook to “Rails Developer Extraordinaire”,
and commit your changes to GitHub!
Remember we only need to add our files, commit our changes and push them up:
$ git status                          ## see which files have been edited
$ git add -A                          ## add all relevant files
$ git commit -m "We have web pages!"  ## commit your bits
$ git push                            ## push them up

Comments
Post a Comment