[ToDoList] Building the App
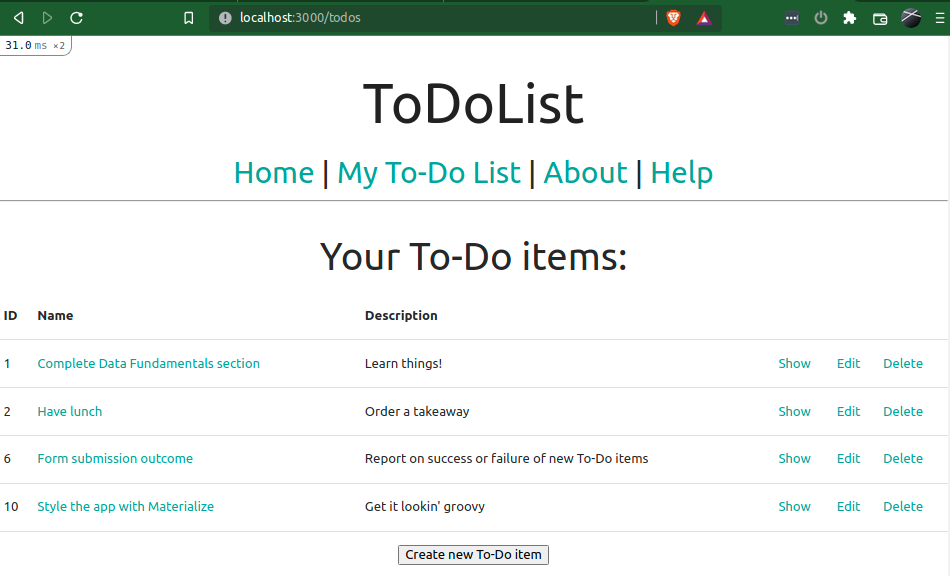
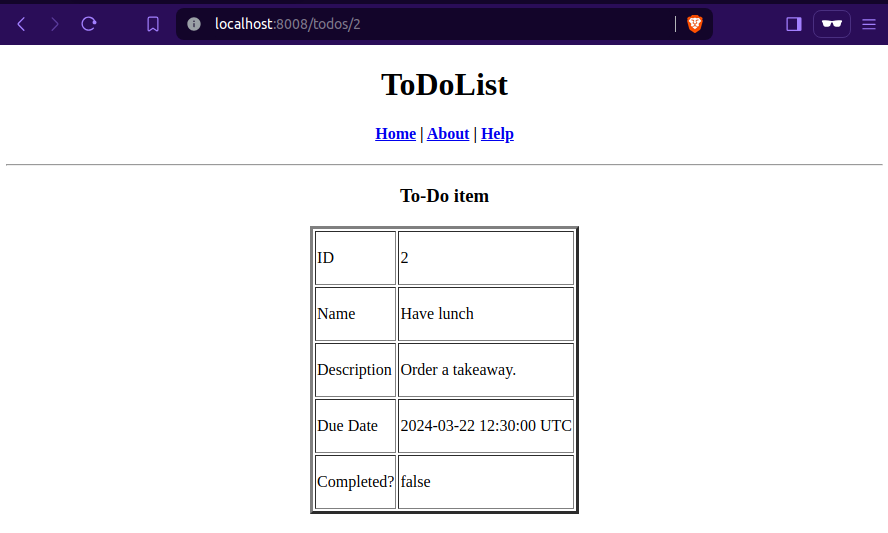
So we have now learned some theory about Rails and set up our development environment with the required packages and version control prerequisites. I think that’s enough preamble, let’s get developing! The next few sections will involve creating a funky little web app that contains a To-Do list that we can add, remove and edit entries from.
We saw a very small snippet of the extensive file structure that Rails uses in the first section.
If you thought you’d be constructing the longest mkdir -p command in the observable universe to get all of this set up,
you will be pleased to know (as I was) that our first utilisation of Rails magic will be to get Rails to generate all of this for us!
Feel free to set up a projects directory on your dev machine, or you can just use your home dir if you’d prefer. Whatever you choose, change into this dir now and perform our first act of Rails witchcraft:
$ cd /path/to/your_projects_directory  ## just 'cd' if you are working from your home dir
$ rails new to_do_list                 ## ToDoList will be the name of our app
This will do a whole bunch of stuff so that you don’t have to, including:
- Creating the new directory that contains our app (in this case,
to_do_list/). - Creating the skeleton of our app (files and directories).
- Initialising the app as a Git repository.
- Installing prerequisite gems (libraries) and dependencies (JavaScript, database).
|
NOTE: If, for some reason, you are building this app in a Windows environment (not recommended, for this guide at least),
make sure you disable Rails’ setup of |
It pays to be aware that, by default, the above Rails command will use sqlite as your development database
(this section of the guide will be tested against an sqlite database)
- we will specify a beefier one when we come to deploy our application to a production environment.
If you wish to use an alternative database for development (such as MySQL or postgresql),
you can do so by adding a -d argument to the rails new generator command and specifying the database:
$ rails new to_do_list -d {{DATABASE}}
## for example
$ rails new to_do_list -d postgresql
Similarly, introduced in Rails 7, we can also pass our desired CSS requirement as an argument to the new generator using -c,
which allows for rapid setup of popular CSS frameworks such as Bootstrap or Tailwind, or to simply autoconfigure the sass CSS extension language:
$ rails new to_do_list -c {{CSS_OPTION}}-j - the available options for both of these options can be viewed by running:
$ rails new --help
If your rails new errors out, delete the app directory and make sure you have followed all of the dev environment setup steps above before retrying.
Failing this, you should be able to find a useful error within the returned output which you can use to get the answers you need from Google.
When the generator completes, you have successfully cast your first piece of Rails magic and are ready to go!
It’s as simple as that! For total verification that we are set up and ready to begin developing,
let’s start the development server and check (unless you are that confident in this guide - I’m not).
Again, Rails makes this as simple as possible by allowing you to do this with a simple command,
which you can pass binding (host IP address) and port arguments to (running without arguments defaults to localhost on port 3000):
$ rails server -b {{IP}} -p {{PORT}}server argument can be substituted for simply s!
$ rails sDepending on how you set up your environment there will be different arguments you need to start the server, and different methods of accessing your app’s development instance from the web. The table below outlines how to start the development server and access it from your web browser in the 3 environment examples given at the beginning of this section:
| Environment | Server Start Command | Browser Access URL |
|---|---|---|
| Local Ubuntu VM / Workstation |
|
|
| GCE VM |
|
Navigate to the External IP of your VM via http on port 3000 - this IP will be visible from the table on the
VM Instances
page when it is turned on.
|
| CodeAnyWhere |
|
The Getting Started tab will contain a URL that you can access from your workstation’s browser to view your app once it’s up and running.
If this displays an error, stop your server and add the following to bottom of the |
If you’ve done everything correctly, you should see a rather striking Rails welcome page.

Hug someone you love and take a sip of your preferred type of sparkling wine; you’ve just created a Rails app!
Let’s celebrate in the next section by pushing this to the GitHub repo we set up earlier!

Comments
Post a Comment